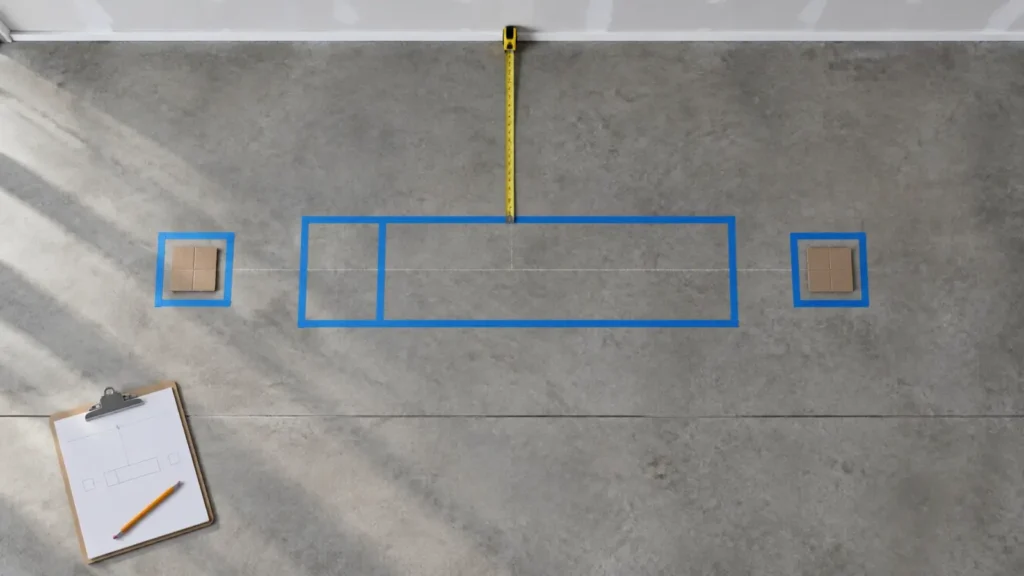
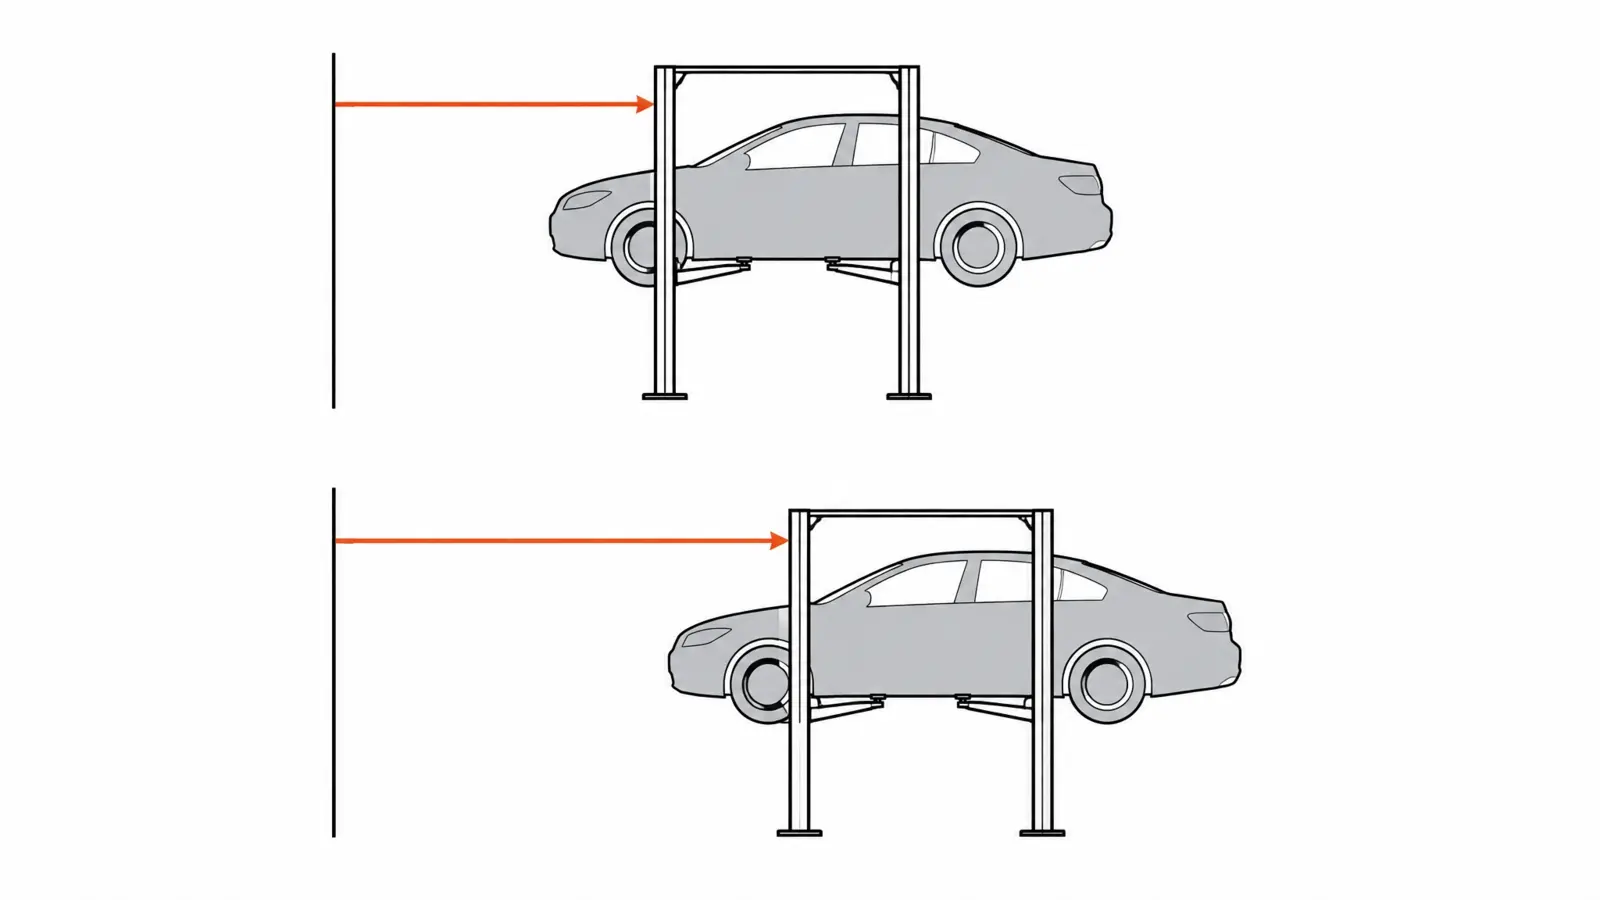
Plan the column centerline about 9 to 10 ft (2.74 to 3.05 m) from the front wall for an asymmetric lift, and about 12 ft (3.66 m) for a symmetric one.
Keep at least 2 ft (610 mm) of walkway beside and behind the vehicle. We recommend 3 ft (914 mm), and more on the power unit side.
The most common mistake with 2 post lift distance from wall is the starting point. Measure from the wall your bumper faces to the center of the columns, not to the post edge or the garage door.
You only drill anchor holes once. Get the placement wrong and you live with it every day: a truck nose that kisses the drywall, a door that won’t open, a creeper that can’t roll past the post.
This guide covers good 2 post lift placement from every side: the planning numbers, the math behind them, and a five-step check for your own bay. For the lift’s own footprint and column spacing, see our full 2 post lift dimensions guide. Here, we focus on where that footprint goes.
Key takeaways
- Arm type sets the number. Asymmetric: about 9 to 10 ft (2.74 to 3.05 m) to column center. Symmetric: about 12 ft (3.66 m), or closer to 13 ft (3.96 m) for crew-cab trucks.
- Plan for your longest vehicle. A 2026 F-150 SuperCrew is about 38.5 in. (978 mm) longer than a 2026 Camry.
- Walkways. 2 ft (610 mm) minimum, 3 ft (914 mm) recommended, 4 ft (1.22 m) between two lifts.
- Anchors. Keep them at least 6 in. (152 mm) from joints, cracks and slab edges.
- Test with tape. Never stand columns up unanchored to try out a layout.
How far should a 2 post lift be from the wall?
Plan the column centerline about 9 to 10 ft (2.74 to 3.05 m) from the front wall for an asymmetric 2 post lift and about 12 ft (3.66 m) for a symmetric one. Then keep at least 2 ft (610 mm), ideally 3 ft (914 mm), of walkway around the longest vehicle you’ll lift.
These are common industry planning figures, not a spec for any one model. The same car lift distance from wall logic applies to every 2-post design. Your manual and your longest vehicle have the final say.
Asymmetric vs symmetric lift placement: why the number changes
On a symmetric lift, all four arms are the same length. The vehicle sits centered between the posts, about half ahead and half behind.
On an asymmetric lift, the front arms are shorter and the columns are rotated slightly. The vehicle sits farther back, with roughly 30% of its length ahead of the columns and 70% behind. That shift is why asymmetric lifts sit closer to the front wall. It also makes the front doors easier to open, since each door clears the post instead of swinging into it.
| Arm type | Vehicle split (ahead / behind) | Column centerline from front wall | Best for |
|---|---|---|---|
| Asymmetric | About 30 / 70 | About 9 to 10 ft (2.74 to 3.05 m) | Cars and SUVs, plus easy in-and-out of the cab |
| Symmetric | About 50 / 50 | About 12 ft (3.66 m), or 13 ft (3.96 m) for crew cabs | Long-wheelbase trucks and vans |
Arm setups differ by model. Compare overhead, adjustable and floorplate options in Daytona’s 2-post lift range, and ask your distributor which arm configuration your model uses.
Why you measure to the column centerline
Column housings vary in size from model to model. The centerline doesn’t. Snap a chalk line across the bay where the column centers will sit, then measure from the wall to that line. Every number in this guide uses that reference.
Common mistake: measuring from the wrong wall
The front wall is the one your bumper faces when the vehicle is parked on the lift. In most home garages, that’s the back wall, opposite the door. Measure from the garage door by mistake and your column line ends up in the wrong place.
How to calculate your own 2 post lift distance from wall
Use your longest vehicle, your arm type and the walkway you want, then do the math. Rules of thumb are fine for a first sketch. For a real layout, we use a five-step check we call WALLS.
- W, wall reference. Pick the wall your bumper faces and mark where the column centerline will go.
- A, arm type. Use a 30/70 split for asymmetric arms or 50/50 for symmetric.
- L, longest vehicle. Plan for the longest vehicle you own or expect to own, not just the one parked there today.
- L, lifting points. Confirm the vehicle’s lifting points fall within arm reach at that position. The ALI Vehicle Lifting Points Guide lists them by make and model.
- S, swing. Walk the path of doors, the hood, the garage door track and your tool carts.
The longest-vehicle formula
In plain English: the distance from the front wall to the column centerline equals the part of the vehicle ahead of the columns, plus your front walkway.
Front wall to column center = (vehicle length times front share) + front walkway.
Bay length works the same way: vehicle length, plus the front walkway, plus the rear walkway. That rear figure answers the common question of how much room you need behind a 2 post lift.
By the numbers: why the longest vehicle matters
A 2026 Toyota Camry is 193.5 in. (4.91 m) long, according to Edmunds’ 2026 Camry specs. A 2026 Ford F-150 SuperCrew with the 5.5 ft box is about 232 in. (5.89 m). That 38.5 in. (978 mm) gap moves your column line by about 12 to 19 in. (305 to 483 mm), depending on arm type.
| Vehicle | Arm type | Ahead of columns | Front wall to column center | Minimum bay length |
|---|---|---|---|---|
| 2026 Camry, 193.5 in. | Asymmetric | 58 in. (1.47 m) | 94 in. (2.39 m), about 7.8 ft | 266 in. (6.74 m), about 22.1 ft |
| 2026 Camry, 193.5 in. | Symmetric | 97 in. (2.46 m) | 133 in. (3.38 m), about 11.1 ft | 266 in. (6.74 m), about 22.1 ft |
| 2026 F-150 SuperCrew, 232 in. | Asymmetric | 70 in. (1.78 m) | 106 in. (2.69 m), about 8.8 ft | 304 in. (7.72 m), about 25.3 ft |
| 2026 F-150 SuperCrew, 232 in. | Symmetric | 116 in. (2.95 m) | 152 in. (3.86 m), about 12.7 ft | 304 in. (7.72 m), about 25.3 ft |
Notice the asymmetric rows land under the 9 to 10 ft rule of thumb. That rule builds in margin for longer vehicles, front-end work and a workbench on the front wall. Treat the formula result as your floor and the rule of thumb as your comfortable target.
Now look at the symmetric truck row. The popular 12 ft rule only works for a crew-cab pickup if you accept a 2 ft walkway. If trucks are in your future, we recommend planning for 13 ft (3.96 m) instead.
Moving a column line on paper is free. Moving anchors isn’t.
How much room do you need beside and behind the lift?
Plan 2 ft (610 mm) as the minimum on each side and behind the vehicle, and 3 ft (914 mm) as the working target. Those figures cover most 2 post lift space requirements in a home garage or a single shop bay.
2 post lift side wall clearance: 2 ft or 3 ft?
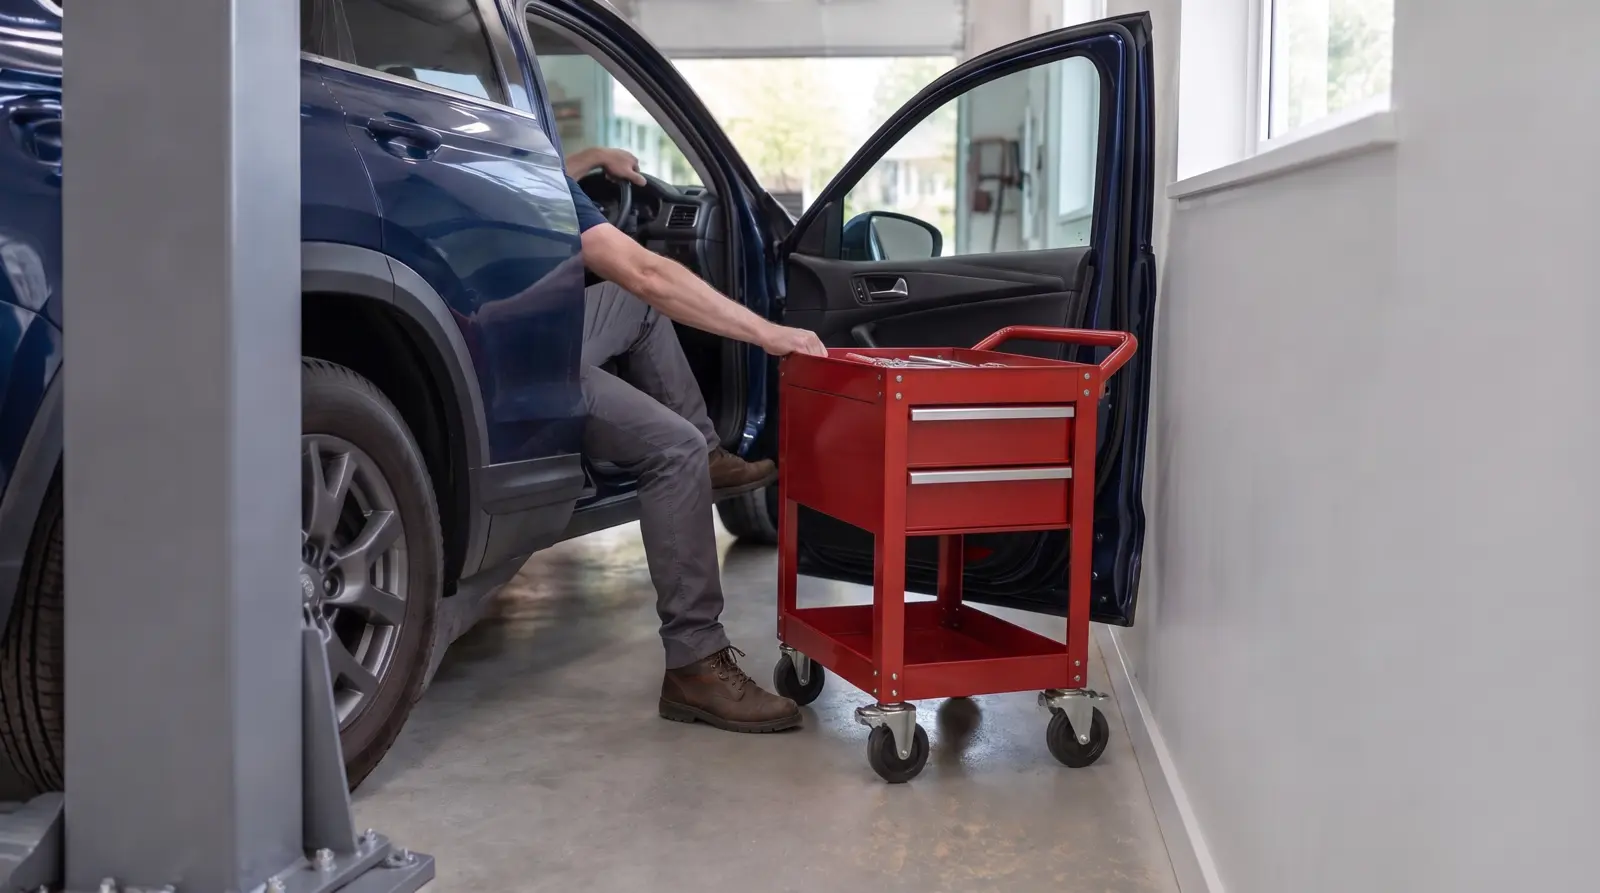
Both numbers show up in lift guides, and they answer different questions. 2 ft is enough room to walk past. 3 ft is enough to work comfortably. Measure from whichever sticks out farther: the outside of the column, or the vehicle with its doors open.
Door swing is the hidden driver. A 2026 F-150 is 79.9 in. (2.03 m) wide without mirrors. Add an open door and a person stepping out, and a 2 ft gap disappears fast.
So how wide does a garage need to be for a 2 post lift? Most 2-post lifts are about 11 to 12 ft (3.35 to 3.66 m) wide overall. Add 2 to 3 ft on each side and a single 2 post lift bay size lands at about 15 to 18 ft (4.57 to 5.49 m) wide.
How adjustable width settings change your side clearance
Adjustable lifts let you trade width for clearance. The adjustable-width LTPA10 offers three width settings, and each step adds about 5.9 in. (150 mm) of width.
The 12,000 lb LTPA12 works the same way with three wider settings, 6 in. (152 mm) apart.
| Model | Width settings | Step between settings | Narrowest to widest |
|---|---|---|---|
| LTPA10 | 88.6, 94.5 and 100.4 in. | About 5.9 in. (150 mm) | 11.8 in. (300 mm) |
| LTPA12 | 107, 113 and 119 in. | 6 in. (152 mm) | 12 in. (305 mm) |
Lay out the side walls for the widest setting you’ll ever use, not the narrowest. It’s easier to have spare room than to find out a wider truck won’t fit.
Which side gets the power unit?
The power unit mounts on one column and sticks out from it. Put that column on the side with more room and easier access to your electrical panel. A licensed electrician should run the circuit. The LTPA10 and LTPA12 both list 240V / 3HP / 13A / 1PH / 60Hz.
Keep the controls where the operator can see the whole lift and vehicle while it moves. A wall that blocks your view of the far side is a reason to flip the layout.
How much room behind a 2 post lift?
Behind the vehicle, you need the same walkway as in front, plus room for anything that hangs off the back: a hitch, a bike rack, an open tailgate. On an asymmetric lift, most of the vehicle sits behind the columns. That’s where tight garages run out of room first.
How far apart should two 2 post lifts be?
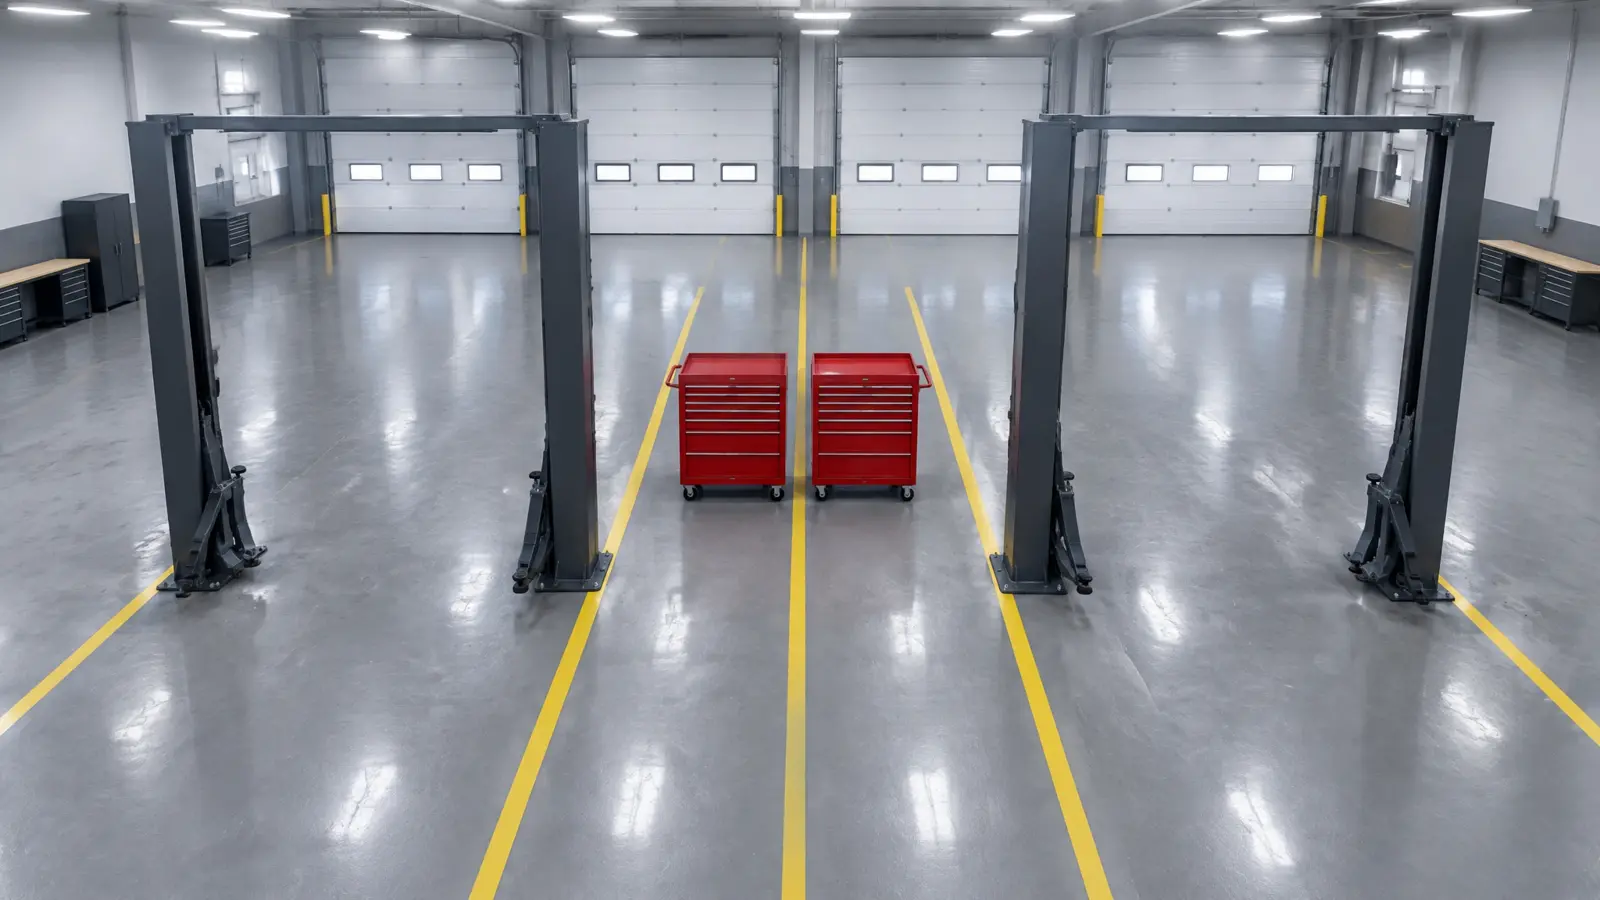
Plan at least 4 ft (1.22 m) of clear aisle between the outer edges of two neighboring lifts, measured with both at their widest setting. The distance between two 2 post lifts has to handle more than a side wall does.
Why? Two vehicles open their doors into the same aisle, and people pass each other with carts. We recommend 4 ft as a planning minimum. Go to 5 ft (1.52 m) if you use rolling jacks or large tool chests.
Center-to-center spacing is then simple: one lift’s overall width plus the aisle. For lifts about 140 in. (3.56 m) wide, that’s about 188 in. (4.78 m), or 15.7 ft, from one bay’s center to the next.
| Clearance zone | Minimum | Recommended | Why it matters |
|---|---|---|---|
| Side wall | 2 ft (610 mm) | 3 ft (914 mm) | Door swing and walking past |
| Power unit side | 3 ft (914 mm) | 3 ft plus power unit depth | Service access to the motor and reservoir |
| Front walkway | 2 ft (610 mm) | 3 ft (914 mm) | Hood access, creepers, walking past the bumper |
| Rear walkway | 2 ft (610 mm) | 3 ft plus hitch or tailgate | Tailgates, racks and drain pans |
| Between two lifts | 4 ft (1.22 m) | 5 ft (1.52 m) | Doors from two vehicles, carts and rolling jacks share one aisle |
Example: a 30x40 shop lift layout
Say you have a 30 x 40 ft (9.14 x 12.19 m) shop with overhead doors on the 40 ft wall. Two lifts about 140 in. wide, 3 ft side walls and a 4 ft shared aisle use about 400 in. (10.16 m), or 33.3 ft. That leaves about 6.7 ft (2.03 m) for a bench.
Depth works too. A crew-cab F-150 with 3 ft walkways needs about 25.3 ft, which leaves roughly 4.7 ft (1.42 m) of the 30 ft for rolling cabinets.
Can a 2 post lift fit in a two car garage?
Often, yes, but it changes the garage. In a 24 x 24 ft (7.32 x 7.32 m) garage, one lift with 3 ft side walls takes about 17.7 ft (5.38 m) of the width. What’s left isn’t enough to park a second car beside it with doors that open.
Depth is the other catch. A 20 ft (6.10 m) deep garage can’t fit a Camry with 3 ft walkways front and back. Measure depth first.
Not sure what fits? Take your bay length, bay width, ceiling height and the vehicles you work on to a local Daytona distributor. They can recommend a model, quote it and arrange installation. Have a question first? Talk to our team.
Find a Daytona DistributorGarage doors, opener rails and the approach path
Keep a raised vehicle’s roof out of the zone where the garage door track and opener rail sit. Walls aren’t the only thing a lift has to clear. Good 2 post lift garage door clearance starts with where those parts end.
Mark where the horizontal door tracks and opener rail end on the ceiling, then drop that line to the floor. Keep the raised vehicle out of that zone, or talk to a door installer about a wall-mounted opener.
Short on height too? Our guide to lift options for 8 ft ceilings covers what fits under a low roof.
Floorplate lift placement
A floorplate lift like the 9,000 lb LTPF9 floorplate model has no overhead beam and stands 110 in. (2.79 m) tall overall, which helps under low ceilings and door openers. The trade-off is a floor cover between the columns that you drive over every time.
Place the plate across your approach path, not in a walkway where people cross on foot. Keep it clear of the door threshold, and plan how jacks, creepers and drain pans will roll over it.
Working on heavier trucks? The 12,000 lb LTPF12 is also a floorplate design, with an overall height of 114 in. (2.90 m).
Overhead models and the beam
Overhead lifts, including the ALI Certified BR10-2OH-33, leave the floor clear between the columns. The beam up top becomes your planning check instead. Confirm it clears the ceiling, lights and opener rail.
The 15,000 lb LTPO15 overhead lift ships with a 2 ft (610 mm) height extension kit that must be installed. Check your ceiling height with the kit in place.
Where should the anchors not go?
Keep every anchor at least 6 in. (152 mm) from expansion joints, control joints, cracks and slab edges. That lift anchor distance from slab edge can shift your column line, so check it before you lock in your wall distance.
Expansion anchors hold by gripping a cone of concrete around the bolt. Near an edge or a joint, that cone gets cut short and the anchor loses holding strength.
Slab thickness and strength come first. Our guide to concrete requirements for a 2-post lift covers thickness by capacity. Your model’s manual sets the anchor type and specs, and a qualified professional should review any post-tension slab.
Warning: don’t stand the columns up to test a layout
Some guides suggest standing the columns up unanchored for a dry run. We don’t. A lift column is tall, heavy and top-heavy, and an unanchored column can tip. Test with tape and cardboard instead, and leave column setting to a trained installer on install day.
How to test your 2 post lift layout before anyone drills
Mock up the whole bay on the floor with tape, then park your real vehicle in it. Math catches most problems. A mock-up catches the rest. Here’s the checklist we recommend.
- Tape the column footprints. Use painter’s tape and cardboard squares cut to the base size on the spec sheet.
- Tape the vehicle outline. Use your longest vehicle, placed at the split for your arm type.
- Park the real vehicle. Line it up with the tape, then open every door, the hood and the tailgate.
- Roll your gear. Walk the aisles with your tool cart, creeper, drain pan and any rolling jack.
- Run the garage door. Open and close it, and mark where the track and opener rail end.
- Check the slab. Mark every joint and crack, and confirm each anchor zone clears them by 6 in. (152 mm).
- Photograph and measure. Send the photos and numbers to your distributor before you order.
Pro tip: tape the raised height too
Add a strip of tape on the wall at the height the vehicle roof will reach when raised. It’s the fastest way to spot a clash with a door rail, light fixture or shelf before it happens.
Once the layout checks out, our step-by-step 2 post lift install guide walks through what happens on install day. ALI recommends a Check360 inspection whenever a lift is installed, and every lift should be inspected at least once a year by a qualified lift inspector under ANSI/ALI ALOIM.
For the bigger picture, including other lift types, see our pillar guide on how to install an automotive lift.
After the lift is in, learn safe car lift use and lifting points before your first lift.
Build a garage you’re proud of: start with the right spot
Tell your local Daytona distributor your bay length, bay width, ceiling height and the vehicles you work on. They’ll recommend a model, quote it and arrange installation. Have a question first? Talk to our team.
- Adjustable width. The LTPA10 and LTPA12 each offer three width settings, so you can tune side clearance.
- 5-2-1 warranty. 5 years structural, 2 years on power units, 1 year on other non-wearing parts. Indoor use only.
- Since 1999. Canadian owned, serving the US and Canada.
About the author

The Daytona Team
Written by the team at Daytona Automotive Equipment, a Canadian-owned manufacturer of automotive lifts, tire changers and wheel service equipment since 1999.
- Specializations. 2-post lift selection, bay layout and installation planning.
- Standards. Guidance aligned to ANSI/ALI ALIS installation practice and ANSI/ALI ALOIM operation, inspection and maintenance practice.
- Reviewed by. Daytona product and technical support staff, October 2026.
Daytona Automotive Equipment Inc. · Brighton, ON, Canada · Automotive lifts, tire changers and wheel service equipment since 1999.
References and sources
- Automotive Lift Institute. ANSI/ALI ALIS: Safety Requirements for Installation and Service. ALI, current edition. Lists placement, concrete work and foundations as planning considerations.
- Automotive Lift Institute. Vehicle Lifting Points Guide. ALI, current edition.
- Edmunds. 2026 Toyota Camry Features and Specs. Edmunds.com, 2026.
- Ford Motor Company. 2026 Ford F-150 Tech Specs. Ford Media, 2026.
Figures in this article are representative for planning and are not quotations. Confirm requirements against the installation manual for your specific lift before purchase or installation. Daytona Automotive Equipment is not affiliated with Harbor Freight’s Daytona tool brand.