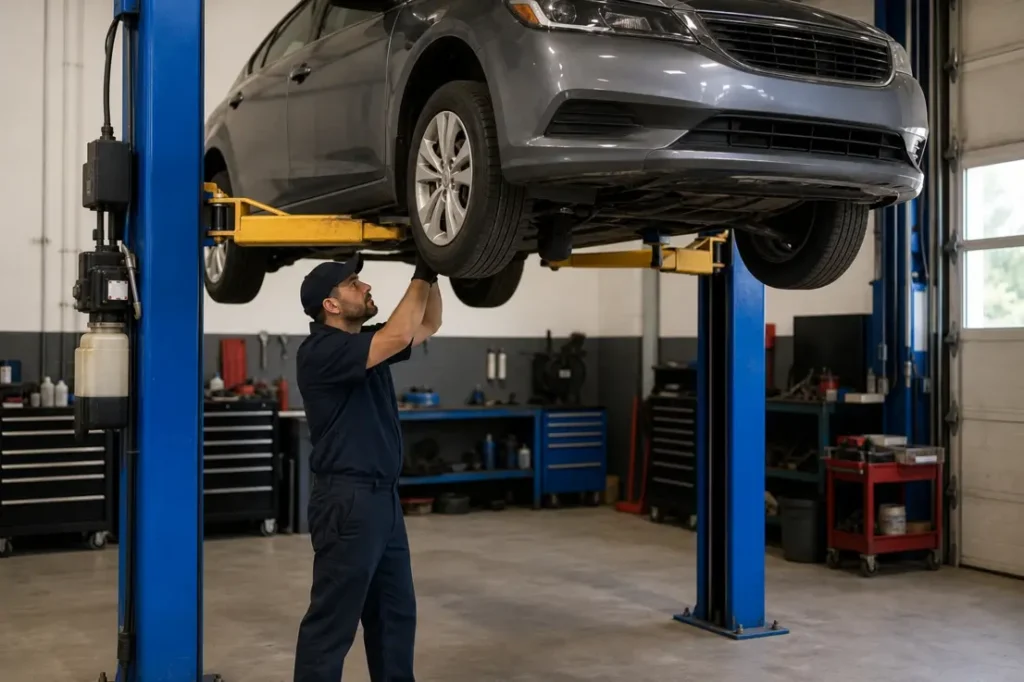
To use a car lift safely, inspect the lift, spot the vehicle over the load center, set the pads or runways to the manufacturer's lifting points, then raise it 4–6 in. (102–152 mm) and shake-test it before going any higher.
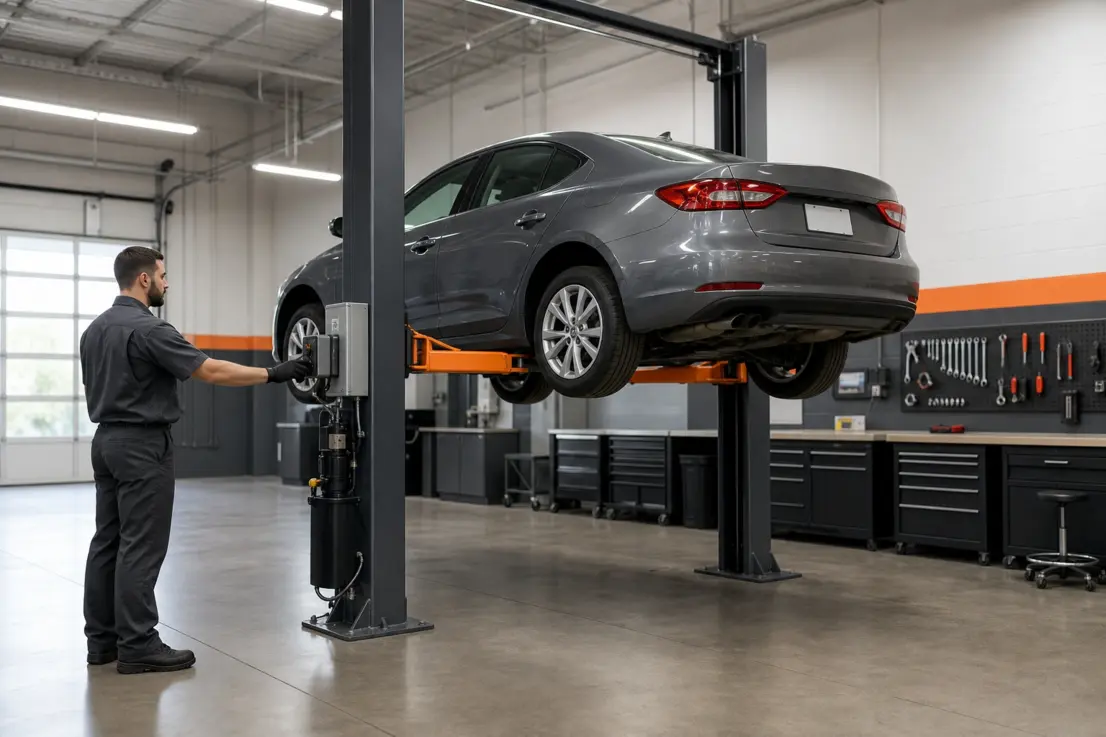
Once it is stable, raise to working height and lower the lift onto its mechanical safety locks before any part of your body goes under the vehicle. Stay at the controls whenever the lift is moving, and lower it fully before driving on or off.
The mistake people make is trusting the hydraulics. Hydraulics raise the vehicle. The locks hold it.
The first time you raise a car over your head, your stomach does something funny. You have 4,000 lb (1,814 kg) of vehicle hanging on a few steel arms, your hand is on the control, and a quiet voice asks the obvious question: am I doing this right? It is a good instinct. A lift makes hard work easy, but it only forgives you when you respect the procedure.
This guide walks you through how to use a car lift safely, from the moment you pull into the bay to the moment the tires touch back down. "Car lift" and "automotive hoist" describe the same piece of equipment, and the steps below apply whatever you call it. It covers 2-post, 4-post, scissor, parking and motorcycle lifts, because the core logic of spotting, lifting, locking and lowering carries across all of them. Daytona has helped shops and serious home garages across the US and Canada set up and run lift equipment since 1999, and the steps below reflect that experience.
Key takeaways
- Inspect first. Cables, hydraulics, anchors, pads and locks get a look before every lift cycle.
- Know your lift type. Frame-engaging lifts need correct lifting points. Wheel-engaging lifts need centering and wheel chocks.
- Use reliable lifting-point sources. The vehicle's service manual, its labeling and the ALI Vehicle Lifting Points Guide. Never guesswork.
- Shake-test at 4–6 in. Raise a few inches, rock the vehicle and reposition if anything moves.
- Locks hold, hydraulics lift. Lower onto the mechanical locks before anyone goes underneath.
- Straps secure, they do not support. Use the working load limit on the tag and never let a strap replace a lock.
- Lower deliberately. Clear the area, stay at the controls and let go if anything looks wrong.
- Inspect annually. ANSI/ALI ALOIM calls for a qualified lift inspection at least once a year.
What is a car lift?
A car lift, also called an automotive hoist, is shop equipment that raises a vehicle off the ground so you can work underneath or around it at a comfortable height. Lifts either grip the vehicle's body at reinforced lifting points, or carry it on its own wheels via runways or a platform. Either way, the vehicle is held in place by mechanical safety locks once it reaches working height, not by hydraulic pressure alone.
How do you use a car lift?
Spot the vehicle over the lift's load center, set the arms or runways to the manufacturer's lifting points, raise it a few inches and shake it to confirm stability, then lift to working height and lower it onto the safety locks before going underneath. Always lower fully before driving on or off.
That is the whole operation in one breath. The rest of this article breaks each phase down so you can do it with confidence, whatever type of lift you own. If you want something to pin on the wall, start with the checklist below, or download the printable PDF.
Car lift safety checklist
Run this checklist every time you use a lift, in this order. It follows the full lift cycle, and each line is something that has caught out experienced technicians, not just beginners. Your lift's operating manual comes first if anything here differs from it.
Daily pre-use inspection
- Safety locks engage with a crisp, audible click on every column or corner.
- Cables show no fraying, kinks or slack, and equalizer cables are evenly tensioned.
- No hydraulic fluid on the floor, power unit, hoses or cylinders.
- Anchor bolts are tight and the concrete around baseplates is not cracked or crumbling.
- Lift pads, adapters and arm restraints are present, undamaged and working.
- The rated capacity label is present and readable.
- Controls work and return to neutral when released.
Before lifting
- You are trained on this specific lift and have read its operating instructions.
- The vehicle's weight, including cargo, is within the lift's rated capacity.
- Lifting points are confirmed from a reliable source, not from memory.
- The vehicle is centered over the load center, or centered on the runways.
- Pads sit squarely on the lifting points, or wheels are chocked on a drive-on lift.
- Arm restraints are engaged on frame-engaging lifts.
- Nobody is in the vehicle, and the bay is clear of people, tools and equipment.
At working height
- You raised the vehicle 4–6 in. (102–152 mm) first and shake-tested it.
- The lift is lowered onto the nearest mechanical lock on every column or corner.
- Every pad is still seated, checked visually, before you go underneath.
- Rated high-reach supplementary stands are in place before removing heavy components.
Before lowering
- Tools, stands, oil drains and creepers are out from under the vehicle.
- Doors are closed and everyone nearby knows the lift is coming down.
- You are at the controls with a clear view of the vehicle.
After the job
- The lift is fully lowered before the vehicle is driven on or off.
- Arms are swung clear and special adapters are removed and stored.
- Chocks are removed, and on alignment lifts slip plates and turntables are pinned.
- Anything that felt wrong during the cycle is reported and the lift tagged out until checked.
Print this checklist. A one-page version to post beside your lift or hand to your team. Free to print and share.
Download the Checklist PDFFirst, know your lift before you touch the control
Every safe lift cycle starts with a walk around the lift, before the engine is even off. You are looking for anything that says "not today": frayed or slack cables, hydraulic leaks under the power unit, loose or cracked concrete around anchor bolts, worn lift pads or a safety lock that does not click crisply. If something looks wrong, stop and get it serviced. Never rig or override a lift to keep working.
Confirm the rated capacity is visible and that it comfortably exceeds the weight of what you are lifting, including anything in the trunk or truck bed. Many lift incidents trace back to the same few operator mistakes: rushing the vehicle into position instead of centering it carefully, guessing where the weight balances rather than confirming it, or skipping the wheel chocks on a drive-on lift. All three mistakes are avoidable in the first 60 seconds of the job. The Automotive Lift Institute covers safe lift use in detail, and it is worth reading in full if you operate lifts regularly.
Frame-engaging vs wheel-engaging lifts, and why it changes everything
Nearly every lift falls into one of two families, frame-engaging or wheel-engaging, and they are operated differently. Before the how, you need the what.
A frame-engaging lift grabs the vehicle by its body. The arms reach in and lift pads contact the manufacturer's reinforced lifting points along the rocker panel or frame. The wheels hang free. The classic example is a 2-post lift, and this is the type where correct lifting-point placement matters most. Shops favor frame-engaging lifts because free wheels give full access to brakes, suspension, exhaust and tires at once, which is why they dominate general repair bays despite needing more care to set up than a drive-on model.
A wheel-engaging lift carries the vehicle by its tires. You drive onto runways or a platform and the whole car goes up sitting on its own wheels. Most 4-post lifts, parking lifts and many scissor lifts work this way. There are no lifting points to find, but you must center the vehicle and chock the wheels.
The family also decides which jobs a bay can do. A frame-engaging 2-post handles a tire rotation easily because the wheels hang free. A wheel alignment needs the vehicle sitting on its wheels with turntables and slip plates, which is the job of an alignment lift such as the LFPA12. Knowing which family your lift belongs to tells you which of the steps below apply. You can compare every configuration on Daytona's automotive lifts hub.
Vehicle lifting points: how to find them
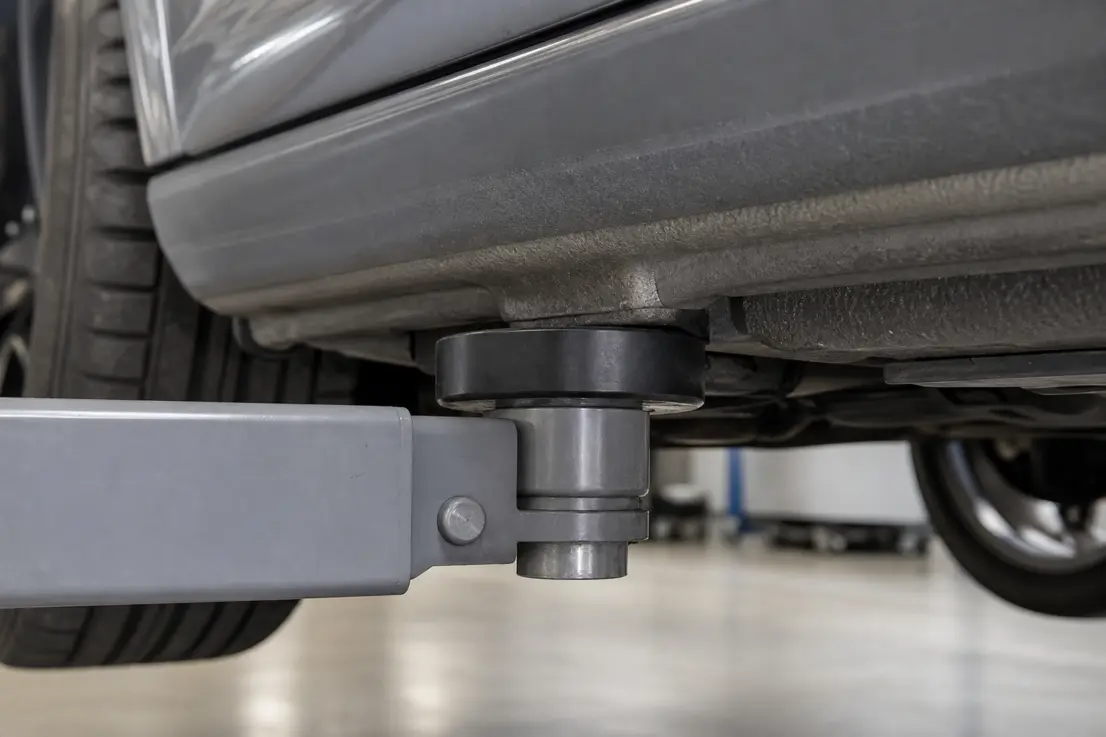
Use the vehicle manufacturer's recommended lifting points every time, taken from a reliable source, and never improvise a contact point. On a frame-engaging lift, the lifting points are the only parts of the vehicle designed to carry its weight on pads.
Three sources are reliable: the vehicle's owner or service manual, the labeling on the vehicle itself (often a door-jamb decal or triangle marks on the pinch weld) and the ALI Vehicle Lifting Points Guide. A coworker's memory or "where we usually put it" is not a source, even if that coworker is the service manager. Check every time, especially on a model you have not lifted for a while.
Most passenger cars have four points, located just behind the front wheels and just in front of the rear wheels along the reinforced pinch-weld seam. Some vehicles need extra care:
- Unibody cars and crossovers. Many can be lifted at the pinch weld, but the exact location varies by model, so confirm it rather than assume it.
- Electric and hybrid vehicles. Pads must never contact the battery enclosure. Use only the points the manufacturer specifies.
- Pickups, vans and SUVs. Frame points can sit high or wide. Long-bed trucks may put the points beyond the reach of your lift arms.
- Rusted vehicles. Inspect the lifting points before you lift. Corroded pinch welds or frame rails can crush or tear under load.
- Modified vehicles. Running boards, lift kits and body kits can block the factory points. Find a lift or adapter that reaches them properly.
If the arms do not reach the recommended points, or something is in the way, that lift is not suited to that vehicle. Use the adapters made for your lift, or use a different lift. Never stack wood blocks on the pads or place adapters anywhere under the body, frame or suspension just because they fit.
How to use a 2-post lift (frame-engaging)
A 2-post lift is safe when the vehicle is balanced between the columns and all four pads sit on the correct lifting points. It is the most common shop and home lift, and the one that demands the most care, because you choose where the lift touches the car. Get the lifting points right and it is rock solid. Get them wrong and you can bend a rocker, pop a windshield or drop the vehicle.
Step 1: Confirm the lifting points
Look up the manufacturer-recommended lifting points using the sources in the lifting points section above. Do this before the vehicle is in the bay, so you are not guessing with the car already over the arms.
Step 2: Spot the vehicle over the load center
Pull the vehicle in so its center of gravity sits between the columns, not ahead of or behind them. On many rear-wheel-drive cars the center of gravity sits roughly below the driver's seat. On front-engine, front-wheel-drive cars it sits a little farther forward. Pickups, vans and vehicles carrying cargo vary widely, so check the guidance for that vehicle. Resist the urge to slide the car forward just to open a door more easily. Put it where it balances.
Step 3: Set the arms and pads
Swing the arms in and extend them so all four pads sit squarely under the lifting points. Adjust pad height with the screw or telescoping adapters so the vehicle will rise level. Trucks, vans and SUVs often need height adapters to clear the rocker panel. Use only adapters made for your lift. Never stack wood blocks or fabricate your own: it is unsafe, and improper use can void your warranty. Confirm the arm restraints are engaged.
Step 4: Raise a few inches and test
Raise the vehicle until the tires are about 4–6 in. (102–152 mm) off the floor, then stop. Push and rock the car firmly at the front and rear. If a single arm can be wiggled while the other three bear weight, or the vehicle shifts on a pad, the load is uneven. Lower it, reposition and try again. This shake test is the most important 10 seconds of the whole job.
The even-load rule
The vehicle's weight must be balanced across all four arms. Lift arms are not designed to share the load equally in every position, so check your lift manual for its rated capacity and load-distribution limits rather than dividing the capacity by four. Never lift one end of a vehicle, one side, or on a single arm with a 2-post lift. If anything feels unbalanced, it is.
Step 5: Lift to height and set the locks
Once stable, raise to your working height. You will hear the safety locks clicking as you go. At height, lower the lift so it settles onto the nearest mechanical lock. Visually confirm every pad is still seated before you put any part of your body under the vehicle. If you will remove a heavy component such as a transmission, put rated high-reach supplementary stands in place first, because removing weight shifts the center of gravity.
How to use a 4-post, parking or scissor lift (wheel-engaging)
On a drive-on lift, center the vehicle, chock the wheels and set the lift onto its locks before working. Drive-on lifts are more forgiving because the load spreads across the tires and platform, but they have their own rules.
Center the vehicle on the runways or platform so the tires sit an equal distance from each edge, and stop where the manufacturer marks the load center. Turn the engine off, put it in park or gear and chock the wheels. Drive-on lifts have roll-off stops at the ends, but chocks are what keep the car from rolling.
Raise to height, then set the lift onto its mechanical lock ladders so each corner is level and supported. Daytona 4-post lifts lock at positions every 3.5 in. (89 mm), and parking lifts add primary and secondary lock systems. If you need the wheels free for brake, tire or suspension work, use a rolling jack. Daytona's RAJ5 and RAJ6 fit the 9K and 10K parking lifts, and the RAJ8 fits the LFPA12 and LFPA14 alignment lifts. Daytona rolling jacks are designed for Daytona lifts and may not fit other brands, so confirm compatibility before ordering. Slide the jack between the runways, raise the end you need and lower it onto its own safety latch before reaching in. Always lower a rolling jack completely before driving the vehicle on or off.
Scissor lifts have no columns, which makes them quick to use but very sensitive to a level slab. Whether yours is surface-mounted or portable, follow its manual for floor requirements. Scissor lifts that raise the vehicle on pads are frame-engaging, so the lifting-point rules above apply to them as well. A mid-rise model such as the LMS6 or a high-rise model such as the LHS7 uses the same lifting logic: center, lift a little, confirm stability, then raise and lock.
Not sure which lift suits the work you do most? Take your ceiling height, bay width and the vehicles you work on to a local Daytona distributor. They quote, deliver and install, including single home-garage orders. Have a question first? Talk to our team.
Find a Daytona DistributorHow to use a motorcycle or ATV lift
Chock and strap the machine before you raise it, then lower the platform onto its mechanical lock. A motorcycle and ATV lift is the simplest of all, but a tipping bike is no small thing. Roll the machine onto the platform, secure the front wheel in the chock and strap it down before you raise it. Confirm the lift is on a flat, solid surface, raise to height and set it onto its mechanical lock. On the LMATV, fit the side extensions for ATVs so the platform fully supports the wider stance.
Car lift strap safety tips
Inspect every strap before use, use only straps whose working load limit exceeds the load, and never let a strap stand in for a lift's mechanical safety lock. Straps show up on a typical lift job mainly as tie-downs: securing a motorcycle or ATV to its platform, or holding a vehicle or load in place on a drive-on platform. In every case the strap is a safety component, not an afterthought, and it deserves the same inspection habit as the lift itself.
Use the working load limit, not the break strength
A tie-down strap should carry a tag showing its working load limit (WLL). That is the figure to plan with. The break strength printed on packaging is much higher and is not a safe working figure. If the tag is missing or unreadable, retire the strap, because you no longer know what it is rated for.
Inspect before every use
Check the full length of the strap for fraying, cuts, burns, cracked or pulled stitching, chemical damage and sun-faded webbing. Check the ratchet or cam buckle for rust, bent parts or a release that does not lock. Retire any strap that shows wear rather than pushing another cycle out of it.
Rig it correctly
Keep the webbing flat against the frame or tire, never twisted or knotted. Use edge protectors where the strap crosses a sharp edge. Anchor straps to the lift's designated tie-down points and to solid frame or chassis members, not to plastic trim, brake lines, wiring or exhaust parts. On a motorcycle, seat the front wheel in the chock first, then strap at opposing angles and compress the suspension slightly so the bike cannot bounce loose. Make sure the ratchet or buckle is fully engaged and cannot slip under load.
Know what a strap never does
A strap secures the vehicle to the platform. It does not hold the platform up, and it never replaces a mechanical safety lock. It also does not stabilize a vehicle on a 2-post lift when you remove a heavy component: that is the job of rated high-reach supplementary stands. If a strap or sling needs to bear meaningful weight during the lift itself, use only one rated and sold for that specific lift, the same rule that applies to lift pads and adapters.
Store straps properly
Store straps dry, out of direct sunlight and away from battery acid, solvents and brake fluid, all of which weaken webbing over time. A strap that lives on the floor of a shop bay ages much faster than one hung on a hook.
Quick reference: how each lift type lifts and the key step
Use this table to match each lift type to the one operating step that matters most. Confirm capacity and procedure against your own model's manual.
| Lift type | How it lifts | Key operating step | Daytona examples |
|---|---|---|---|
| 2-post (frame-engaging) | Pads under the body lifting points, wheels hang free | Set all four pads to the OEM lifting points, then shake-test at 4–6 in. | BR10-2OH-33, LTPA10, LTPF9 |
| 4-post and parking | Drive-on runways, tires carry the load | Center the vehicle, chock the wheels and set the lock ladders at every corner | LFPP9, LFPP10 |
| Scissor | Pads under the frame, or runways | Confirm a level slab, then lift and lock | LMS6, LHS7 |
| Motorcycle and ATV | Platform under the chassis and tires | Chock and strap, then raise and lock | LMATV |
How to lower a car lift safely
Clear the area, release the locks and lower smoothly while you stay at the controls watching the vehicle. Most guides obsess over lifting and gloss over coming down, which is where carelessness creeps in. Treat lowering as deliberately as raising.
- Make sure no tools, jack stands or equipment are under the vehicle, and that all doors are closed.
- Alert anyone nearby that the lift is coming down, and make sure they are out of the lift area.
- Raise slightly first to take the weight off the safety locks, then release them. Most Daytona lifts use a single-point release.
- Lower smoothly and watch that both sides, or all four corners, descend evenly.
- Bring it all the way to the floor before driving on or off.
Where you stand matters. Stand at the lift controls, with a clear view of the vehicle and of anyone near it, not in front of the vehicle or off to one side. Lift controls are designed to stop when you let go, so stay at the control for the entire time the lift is moving. Never walk away mid-cycle, and never block, tie down or disable a lock, control or limit switch to save a few seconds, including on the way down.
If something looks or sounds wrong while lowering, let go of the control so the lift stops, and assess it. Do not try to rush the vehicle to the floor. If a vehicle ever looks like it is going to fall, get out of the way immediately. Do not try to catch it, steady it or wedge a stand under it.
Lift safety questions technicians ask
These are the questions that come up most in lift training and in the shop, answered in plain terms. They match the safety guidance from ALI and your lift manual, and they are a useful self-check for new and experienced operators alike.
What do you do right after spotting a vehicle on a lift?
Set the pads or chocks, then raise the vehicle slightly and check it for stability. Capacity and a clear bay should already be confirmed before you spot the vehicle. The few-inch test lift is the step that catches a bad pad placement before it becomes dangerous.
What is the most important check before going under a raised vehicle?
The shake test at a few inches off the ground, followed by lowering onto the mechanical locks. Checking fluid levels or restraint function belongs in the daily inspection. The stability test is what confirms this vehicle is safe on this lift right now.
How do you reliably test that a vehicle is safe to lift?
Look, shake and check. Look at every pad placement, raise a few inches and shake the vehicle firmly, then check the pads again before raising further. Eyeballing it alone, or asking a coworker if it looks right, is not a test.
Does the center of gravity matter on a frame-engaging lift?
Yes. The vehicle's center of gravity must sit between the columns so the load is balanced across the arms. Cargo, removed components and vehicle type all move it, which is why spotting is a deliberate step rather than "close enough."
Can you lift just one end of a vehicle on a 2-post lift?
No. Using two arms, chocking the wheels or engaging the arm restraints does not make it safe. A 2-post lift is designed to raise the vehicle level on all four arms.
Is it ever OK to override the lift controls?
No, including while lowering. The controls are designed to stop the lift the moment you let go. Wedging, tying or overriding them to save time removes the one thing that stops the lift when something goes wrong.
Do you need to be at the controls whenever the lift moves?
Yes. The operator stays at the controls, watching the vehicle, for every second the lift is in motion, up or down.
Where can you place frame-engaging lift adapters?
Only at the vehicle manufacturer's recommended lifting points. Adapters cannot go anywhere under the body, frame or suspension. Placing them elsewhere can damage the vehicle and let it slip off the pads.
Can you add wood blocks to the pads for extra clearance?
No. If the arms contact running boards or trim, use the height adapters made for your lift or use a different lift. Wood blocks can split, slide or crush under load.
What if the arms do not reach the lifting points on a long truck?
Then that lift is not suited to the job. Use adapters designed for your lift that reach the correct points, or move the vehicle to a lift that fits it, such as a drive-on 4-post.
How do you check whether cargo puts a vehicle over capacity?
Add the cargo weight to the vehicle's weight and compare the total with the lift's rated capacity. A heavy load in a truck bed also shifts the center of gravity rearward, so even a vehicle inside the capacity may not balance. Unload the bed before lifting.
When should the safety locks be engaged?
Before anyone works under the vehicle, every time, however short the job. Lower the lift onto the mechanical locks after reaching height. There is no "just a quick look" exception.
Can anyone stay inside the vehicle while it is raised?
No, never. Movement inside the vehicle shifts its weight on the pads. Everyone is out of the vehicle before it leaves the ground.
Should you read the operating instructions only the first time?
No. Read them before your first use, and go back to them whenever you use an unfamiliar lift, lift an unusual vehicle or are unsure of a step. Operators should be trained on each lift before it is put into service.
Certification, inspection, warranty and indoor use
Lift certification is granted per model, not per brand, and every lift should be inspected at least once a year whether or not it is certified. Building code and listing requirements for lifts vary by jurisdiction and are set by your local building department, the Authority Having Jurisdiction (AHJ). If your jurisdiction or insurer asks for a certified lift, Daytona's ALI Certified BR10-2OH-33 overhead 2-post lift has been certified to ANSI/ALI ALCTV by a third party, and you can verify any model in the ALI Directory of Certified Lifts.
Inspection is separate from certification. ANSI/ALI ALOIM requires every lift to be inspected at least once a year by a qualified lift inspector, and ALI recommends a Check360 inspection whenever a lift is installed. Look for an ALI Certified Lift Inspector. ALI runs the only ANSI-accredited lift inspector certification program in North America. Between inspections, our 2-post lift maintenance checklist covers the daily, monthly and annual checks.
Across the Daytona line, the focus is built-in safety: automatic locks with single-point release, height limit switches, aircraft-quality cables on 4-post models and the 5-2-1 warranty. One firm rule: all Daytona equipment is rated for indoor use only, and outdoor installation voids the warranty.
If you have not set the lift up yet, or you want a refresher on what it sits on, our guides on car lift installation, installing a 2-post lift and how thick your concrete needs to be cover everything underneath a safe operation.
Get a quote from your local Daytona distributor
Tell your local Daytona distributor about your bay and the vehicles you lift most. They will recommend a model, quote it and install it. Have a question first? Talk to our team.
- BR10-2OH-33. 10,000 lb overhead 2-post, ALI Certified.
- 5-2-1 warranty. 5 years structural, 2 on power units, 1 on parts. Indoor use only. Warranty-parts freight covered within Canada and the continental US.
- Since 1999. Canadian-owned, serving the US and Canada with lifts, tire changers, balancers and accessories.
About the author

The Daytona Team
Written by the team at Daytona Automotive Equipment, a Canadian-owned manufacturer of automotive lifts, tire changers and wheel service equipment since 1999. Daytona serves professional shops, mechanics, car enthusiasts and parking facilities across the United States and Canada through its distributor network.
- Specializations. 2-post, 4-post, scissor, parking, alignment and motorcycle lifts, lift operation and safe lifting practice.
- Standards. Guidance aligned to ANSI/ALI ALIS installation practice and ANSI/ALI ALOIM operation, inspection and maintenance practice.
- Reviewed by. Daytona product and technical support staff, October 2026.
Daytona Automotive Equipment Inc. · Brighton, ON, Canada · Automotive lifts, tire changers and wheel service equipment since 1999.
References and sources
- Automotive Lift Institute. Be a Smart Auto Lift User. ALI.
- Automotive Lift Institute. Vehicle Lifting Points Guide. ALI.
- Automotive Lift Institute. ALI Directory of Certified Lifts. ALI.
- ANSI/ALI ALOIM, Safety Requirements for Operation, Inspection and Maintenance of Automotive Lifts, current edition. Automotive Lift Institute.
Figures in this article are representative for planning and are not quotations. Confirm requirements against the installation and operating manual for your specific lift before purchase, installation or use. Daytona Automotive Equipment is not affiliated with Harbor Freight's "Daytona" tool brand.