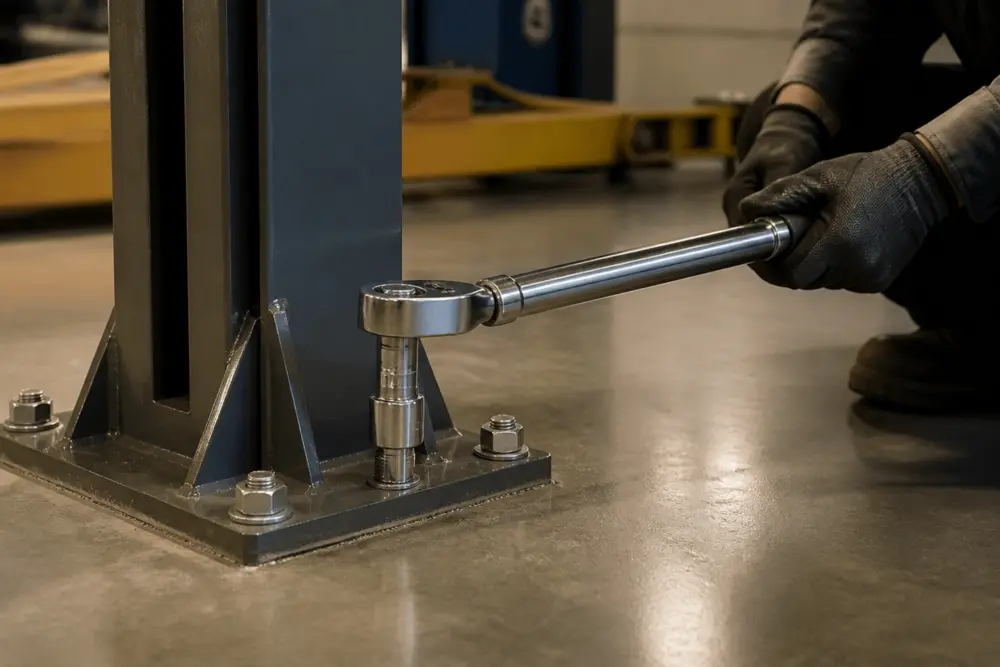
Your lift is on the truck, the bay is cleared, and you have one day set aside. Now you need to know how to install a 2 post lift properly, because what happens over the next six hours decides whether that lift is safe for the next twenty years.
The job itself is not complicated. It is unforgiving. Almost every service call we hear about later, from arms that will not stay level to anchors that keep loosening, traces back to one step that got rushed on install day. This guide walks the whole job in five phases, plus the four checks you must clear before you drill a single hole.
The Short Answer
Install a 2 post lift in five phases. First, verify your slab, ceiling height, power and bay layout. Second, snap a chalk line and set the columns square. Third, drill, clean, shim and torque the anchors to the value in your model manual. Fourth, fit the overhead beam or floor channel, route the equalizer cables, connect the hydraulics and have an electrician wire the power unit. Fifth, install the arms and run at least three no-load cycles before any vehicle goes up. Plan a full working day, and use a qualified installer for any commercial bay.
How Do You Install a 2 Post Lift?
You install a 2 post lift by verifying the site first, then setting and anchoring the two columns to the spacing in your manual, then connecting the cables, hydraulics and power, then testing the lift empty before it carries any weight. Two trained people usually need four to six hours for the mechanical work when the slab, ceiling and power are already in place. A first install takes longer, and that is fine. Nothing about this job rewards speed.
| Phase | What happens | Typical time |
|---|---|---|
| 1. Verify the site | Slab, ceiling, power and bay layout confirmed against the manual | Before install day |
| 2. Lay out and stand the columns | Chalk line, column spacing, orientation, square check | 45 to 60 minutes |
| 3. Drill and anchor | Drill, vacuum, set anchors, shim plumb, torque to spec | 60 to 90 minutes |
| 4. Assemble and connect | Overhead beam or floor channel, cables, hydraulic lines, fluid fill, wiring | 90 to 150 minutes |
| 5. Commission | Arms and restraints, bleed, no-load cycles, sign-off | 45 to 60 minutes |
Electrical work is scheduled separately and handled by a licensed electrician. Do not treat it as part of the six hours.
Should You Install It Yourself or Hire a Qualified Installer?
The honest answer depends on your bay, your slab data and your tools. A hands-on owner with a verified slab, a calibrated torque wrench and a capable helper can install a 2 post lift in a home garage. A commercial shop should not. In North America, ANSI/ALI ALIS "Safety Requirements for Installation and Service" is the standard that governs lift installation. It sets out installer qualifications, required training, and the documentation an owner should keep on file. It took effect in August 2022 and it exists because installation errors are the most common root cause of lift failures.
| Your situation | Recommended path |
|---|---|
| Commercial shop, dealership or any workplace bay | Qualified installer, with documentation retained |
| Slab thickness, strength or age is unknown | Verify the slab first, then use a qualified installer |
| Post-tension, reinforced or repaired slab | Structural engineer review first, no exceptions |
| Home garage, verified slab, two capable people, torque wrench on hand | Self install is realistic if you follow the manual exactly |
| No rotary hammer or no calibrated torque wrench | Qualified installer, or rent the tools before you start |
| Overhead model with a heavy top beam and no second helper | Qualified installer |
There is a warranty dimension too. Daytona's 5-2-1 warranty covers structural components for five years, power units for two, and other non-wearing parts for one. It does not cover damage caused by improper installation. That is not fine print designed to trap you. It reflects the fact that a badly anchored lift damages itself in ways a well anchored one never does.
The Four Gates: What to Verify Before Install Day
Treat these four checks as hard stops. If any one of them fails, stop and fix it before the lift arrives. Every one of them is cheap to solve in advance and expensive to solve after you have drilled ten holes in a slab.
| Gate | What to confirm | Stop if |
|---|---|---|
| 1. Slab | Thickness, compressive strength, cure age, no cracks or joints in the column footprint | Anything is below your manual's minimum, or unknown |
| 2. Ceiling | Overall lift height, plus your tallest vehicle, plus a safety gap | Clear height is under the model's overall height |
| 3. Power | A dedicated circuit at the voltage and amperage on the spec plate, within reach of the power column | No dedicated circuit exists yet |
| 4. Layout | Bay width, column spacing, three feet of walking room each side, nothing overhead in the way | Ducts, beams, lights or drains sit in the footprint |
Gate 1: The Slab
This is the only gate that fails catastrophically. Everything else on the list is recoverable. Most 2 post lifts require a minimum of 4 to 4.25 inches of 3,000 PSI concrete, cured at least 28 days, and heavier capacities require more. Your model manual sets the real number. If you are unsure what you are standing on, read our full guide on how thick concrete needs to be for a 2 post lift before you go further. Never anchor into an unverified slab, a slab with a control joint running through the column footprint, or a post-tension slab without a structural engineer's sign-off. Drilling into a post-tension cable is a serious injury risk.
Gate 2: The Ceiling
Add the lift's overall height to a safety gap, then check that against your lowest obstruction, not your highest point. Joists, garage door tracks and light fixtures all count. Overhead models also carry a shutoff bar at the top, so they need more room than floorplate models of the same capacity. If your ceiling is tight, the LTPF9 floorplate lift at 110 inches and the LTPF12 at 114 inches are built for exactly this problem, and our guide to choosing a 2 post car lift for an 8 foot ceiling covers the tightest cases. Going the other way, height extension kits are available through lift accessories, but each kit fits one specific model and is not interchangeable. One important build note: the LTPO15 ships with its 2 foot height extension kit included and must be assembled with that kit fitted.
Gate 3: The Power
Daytona's 2 post lifts run on 240V single phase 60Hz power, drawing roughly 12 to 13 amps depending on the model. The exact figures are on the spec plate and in the manual. Have a licensed electrician size and run a dedicated circuit, positioned so the supplied cord reaches the power column without an extension. In most municipalities this work needs a permit and an inspection.
Gate 4: The Layout
Confirm the centre to centre column spacing in your manual, then check that you still have room to open vehicle doors and walk past the columns. Adjustable models help here. The LTPA10 offers three width settings and the LTPA12 does the same at higher capacity, which gives you options if your bay is not a clean rectangle. If you are still choosing a model, our 2 post car lift buyer's guide works through capacity and configuration.
Tools and People You Need
Gather everything before you start. Stopping halfway through an anchor set to hunt for a socket is how mistakes happen. You will need a rotary hammer with the bit size your manual specifies, a shop vacuum and a hole brush, a calibrated click-type torque wrench, a four foot level, a chalk line, a tape measure, a full socket set, a pry bar, steel shims, safety glasses, gloves, hearing protection and a dust mask. You will also need a forklift or engine hoist to uncrate the lift, which typically arrives well over 1,000 pounds on a freight truck.
Two people is the minimum. The columns are heavy, the overhead beam is awkward, and several steps need one person holding while the other measures.
Phase 1: Lay Out and Position the Columns
Thread the equalizer cables and any chains through the columns while they are still lying flat on the floor. Doing this after the columns are standing is far harder and is a common source of frustration.
Next, snap a chalk line across the bay and measure the centre to centre column spacing from your manual. Stand each column with a helper, align the baseplates to the line, and hold each one plumb while you mark the drill points through the baseplate holes.
Symmetric or Asymmetric
Symmetric setups centre the vehicle between the columns with equal length arms front and rear. Asymmetric setups rotate the columns slightly inward and use shorter front arms, which lets car doors open fully. The two are not interchangeable, and the column orientation is model specific. Confirm which configuration your lift uses before you mark anything, because getting it backwards means drilling twice.
The Square Check
Do not trust that two parallel columns are square to each other. Measure both diagonals across the footprint, from the front left baseplate to the rear right and then the opposite pair. When the two diagonals match, the layout is square. If they do not, adjust before drilling. A layout that is out of square puts uneven load into the arms and shows up later as a vehicle that never quite sits level.
Phase 2: Drill and Torque the Anchors
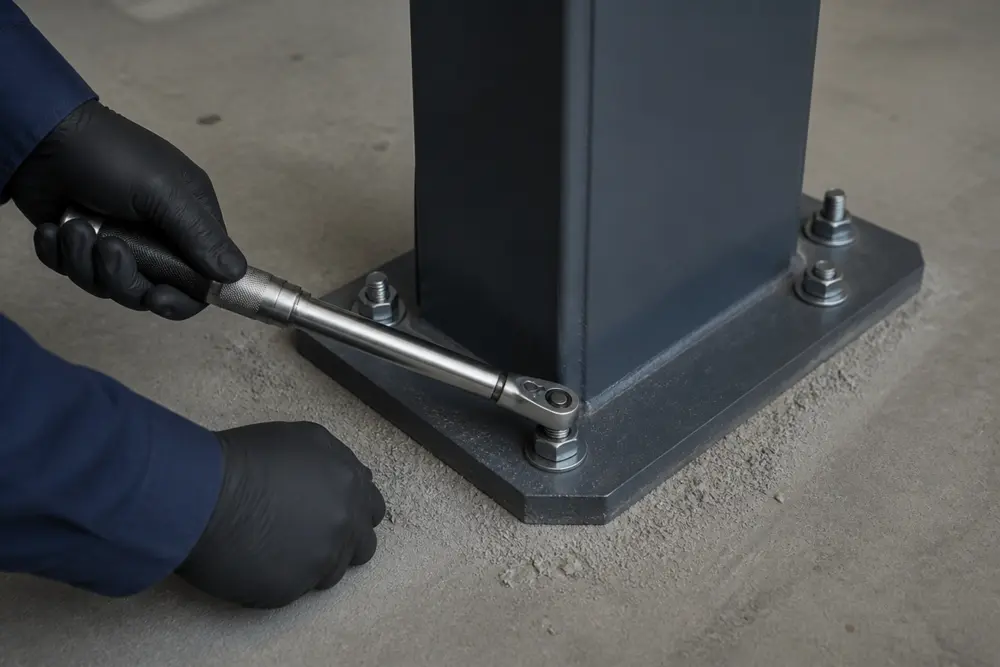
This is the step you cannot improvise. Drill each hole to the embedment depth in your manual, keeping the drill perpendicular to the floor. Then clean every hole. Vacuum it, brush it, vacuum it again. Concrete dust left in a hole is one of the most common reasons an anchor never reaches full holding strength.
Shimming the Columns Plumb
Most shop floors slope slightly for drainage, so some shimming is normal. Use steel shims stacked directly around the anchor bolts, and check plumb in both directions with your level as you tighten. Your manual states a maximum shim thickness. Stay under it. Stacking shims past that limit changes how load transfers into the anchors, and no amount of extra torque compensates for it. If the floor slope needs more correction than the manual allows, the slab has to be corrected first.
Getting Anchor Torque Right
Search online and you will find torque figures for 2 post lifts ranging from 40 to 150 foot pounds, all stated with total confidence. They disagree because anchor diameter, embedment depth and concrete strength all change the correct answer. There is no universal number, and using someone else's is not a shortcut. Use this order of sources instead.
| Priority | Source | Use it for |
|---|---|---|
| 1 | Your model's installation manual | The required torque value and tightening sequence |
| 2 | The anchor manufacturer's data sheet | Hole size, embedment depth, minimum edge distance |
| 3 | Daytona support or your distributor | Resolving any conflict between the first two |
| Never | Forums, videos, another brand's manual | Nothing at all |
Use a Torque Wrench, Not an Impact Gun
Plenty of installers set anchors with an impact wrench because it is faster. An impact gun cannot tell you what torque it applied. Over-torquing crushes the concrete around the anchor and quietly destroys its holding strength, and under-torquing leaves the column able to work loose. A calibrated click-type torque wrench costs a fraction of a service call and is the only tool that gives you a number you can record.
Safety Stop: An Anchor That Spins
If an anchor spins and will not come up to torque, stop turning it immediately. A spinning anchor usually means the hole is oversized, was not cleaned properly, or the concrete at that point is weaker than it looked. Follow the relocation or repair procedure in your manual. Do not compensate elsewhere, and do not put a vehicle on a lift with a suspect anchor.
Phase 3: Overhead Beam or Floorplate, Cables and Hydraulics
What happens next depends on which design you bought. On an overhead model, you lift the top beam into place, bolt it to both columns, and fit the shutoff bar that stops the lift if a tall vehicle contacts it. This is the heaviest and most awkward part of the whole install, and it is the step where a third set of hands genuinely helps. On a floorplate model, there is no beam. Instead you route the hoses and cables through a low channel across the floor between the columns, which is faster and needs no overhead lifting at all.
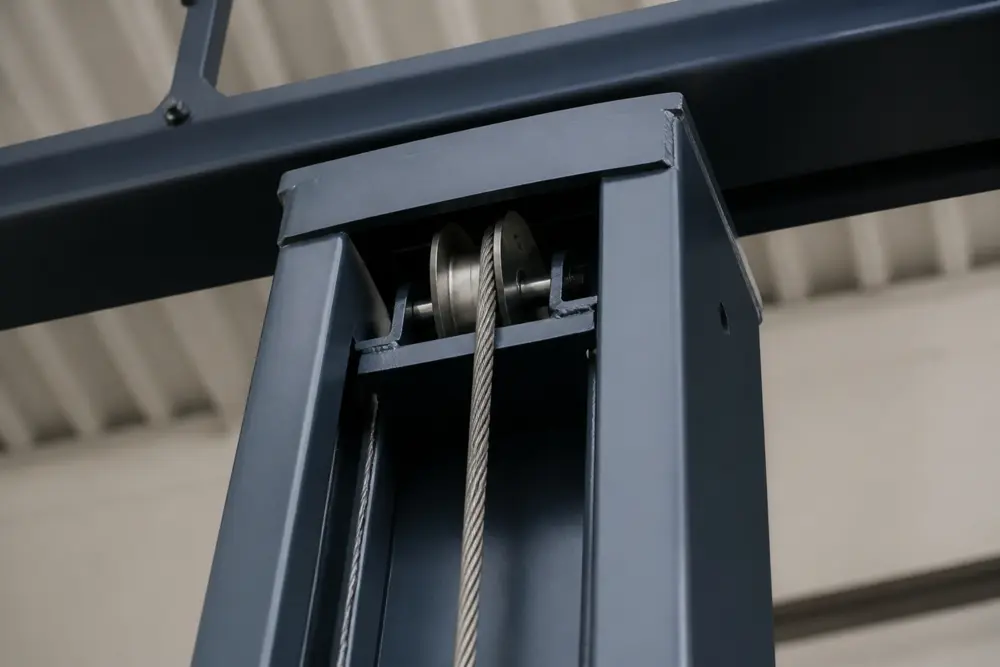
Route the equalizer cables over their sheaves exactly as the manual shows, with each cable seated properly in its groove. These cables do not lift the vehicle. The hydraulics do that. The cables keep both carriages rising at the same rate, which is why a misrouted or unevenly tensioned cable shows up immediately as one side climbing faster than the other.
Connect the hydraulic lines and tighten the fittings to the manual's specification. Follow your manual on thread sealant, since some fittings are designed to seal without it and adding tape can cause leaks or contaminate the system. Fill the reservoir with the fluid type your manual names. Then have your electrician make the final power connection.
One caution worth stating plainly: cables and hoses are wearing parts and are not covered under the 5-2-1 warranty. Kinking a cable or nicking a hose during install is a cost you absorb, so route them carefully.
Phase 4: Fit the Arms and Restraints
Install the arms in their correct positions, front and rear, matching the configuration your lift uses. Fit the arm restraint gears and pins, then check each of the four arms individually. Each restraint must engage cleanly when the arm is set and release properly when you want to move it. Arm restraints are what keep a vehicle from shifting off the pads at height, so test all four rather than assuming they are identical.
Phase 5: Commission the Lift Before the First Vehicle
Bleed the hydraulic system according to the manual, then run at least three complete no-load cycles. A cross-threaded fitting, a misrouted cable or a lock that does not seat properly costs you nothing when the lift is empty. Discovering the same fault with 4,000 pounds overhead is an entirely different situation.
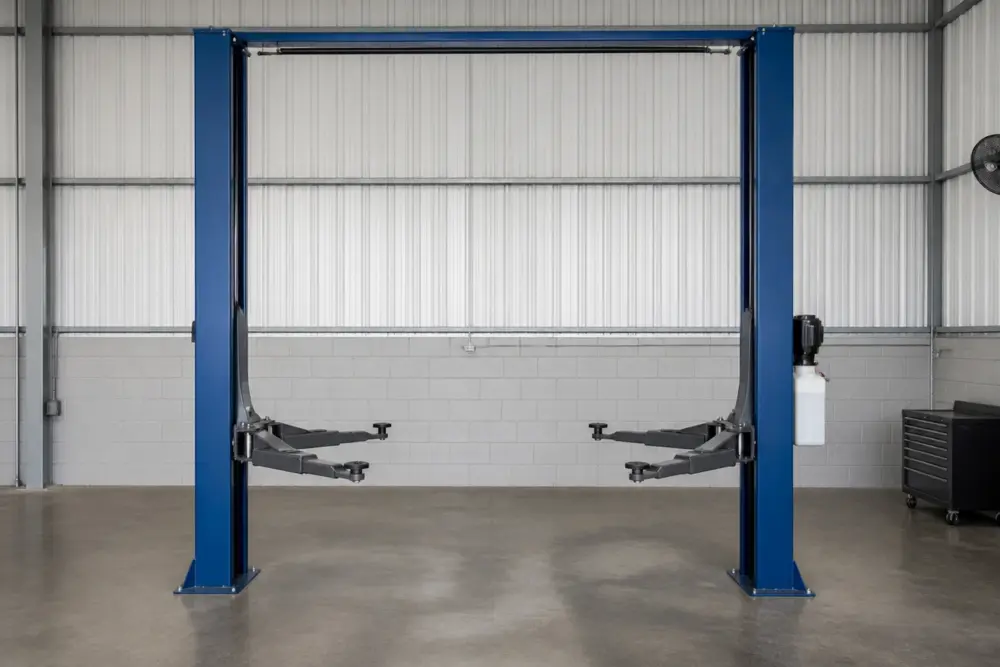
Work through this list and write down the results. Keep the record with your manual. If you ever make a warranty claim, sell the business, or have the lift inspected, this page is the evidence that it went in correctly.
| Check | Pass criteria |
|---|---|
| Anchors | All anchors set and torqued to the manual value with a calibrated wrench |
| Column plumb | Both columns within the manual's tolerance in both directions |
| Safety locks | Engage audibly at every position and hold when pushed down by hand |
| Rise synchronisation | Both carriages rise and lower at the same rate |
| Full travel | No grinding, binding or hesitation through the full range |
| Hydraulics | No weeping at any fitting after three full cycles |
| Arm restraints | All four engage and release correctly |
| Limit switch or shutoff bar | Stops travel at the top of the stroke |
| Fluid level | At the manual's mark after bleeding |
| Documentation | Model, serial number, install date and installer recorded |
Only after all of that goes a light vehicle on the lift. Raise it a few inches, stop, and check the anchors and baseplates again before going any higher. For a full walkthrough of correct loading and lifting points, see our guide on how to use a car lift safely.
Installation Mistakes That Can Void Your Warranty
| Mistake | Why it matters |
|---|---|
| Anchoring into out-of-spec or uncured concrete | Anchors can pull under load. Counts as improper installation |
| Under or over-torquing anchors | Either extreme reduces holding strength and loosens the column over time |
| Shimming beyond the manual's limit | Changes how load transfers into the anchors |
| Installing outdoors or in an exposed space | All Daytona equipment is rated for indoor use only. Outdoor use voids the warranty |
| Skipping the no-load cycles | Turns a small fault into a loaded failure |
| Modifying columns, arms or the power unit | Modifications void the warranty outright |
| Overloading during testing | Overloading voids the warranty and can damage the structure permanently |
Important Safety Note
This article is a general reference. It does not replace your model's installation manual, which always takes priority. Concrete conditions vary widely, and post-tension slabs require a structural engineer's assessment before any drilling. If you are unsure at any point, stop and consult a qualified lift installer.
What Happens After Install Day
Two things belong on your calendar. First, re-torque every anchor after the lift has been in service for a short break-in period, and again on the schedule your manual sets. Anchors commonly settle after the first weeks of real load. Second, in a commercial setting, arrange a professional inspection at least once a year. In Ontario, workplace lifts fall under provincial requirements including Regulation 851 for Industrial Establishments, and similar obligations apply across other provinces and US states.
If this is your first lift, our broader guide on how to install an automotive lift covers four post, scissor and alignment installs, and the full 2 post lift range and automotive lifts hub list overall heights and power requirements for every model.
Frequently Asked Questions
How long does it take to install a 2 post lift?
Plan a full working day. Two trained people typically need four to six hours for the mechanical install when the slab, ceiling and power are already in place. A first-time install runs longer. Electrical work is scheduled separately and is done by a licensed electrician.
Can I install a 2 post lift myself?
Only if you have verified slab data, a calibrated torque wrench, a rotary hammer, a capable helper and the patience to follow the manual exactly. Commercial bays should use a qualified installer, which is what ANSI/ALI ALIS expects. Damage caused by improper installation is not covered by the Daytona warranty.
How thick does concrete need to be for a 2 post lift?
Most models require a minimum of 4 to 4.25 inches of 3,000 PSI concrete cured at least 28 days, and higher capacity lifts require more. Your model manual sets the actual requirement. Never anchor into cracked, unverified, or post-tension slab without a structural review first.
What torque should 2 post lift anchor bolts be set to?
There is no universal figure. Published values across brands range widely because anchor diameter, embedment depth and concrete strength all change the answer. Use the value in your model manual, cross checked against the anchor manufacturer data sheet, and apply it with a calibrated torque wrench rather than an impact gun.
What ceiling height do I need for a 2 post lift?
Add your lift's overall height to a safety gap, then compare that to your lowest overhead obstruction. Overhead models also need room above the shutoff bar, so they sit higher than floorplate models of the same capacity. Check the overall height on your model spec sheet before ordering, not on install day.
Do I need a permit to install a car lift?
It depends on your jurisdiction. The lift itself often does not need one, but new electrical work usually does and typically requires a licensed electrician plus an inspection. Jurisdictions adopting the 2024 IRC and IBC also reference ALI certification for vehicle lifts, so check with your local building department first.
Can I install a 2 post lift on a sloped floor?
A small slope can be corrected with steel shims under the baseplate, but only up to the shim thickness your manual allows. Anything beyond that limit needs the slab corrected first. Stacking shims past the stated limit changes how load transfers into the anchors and is not safe.
What should I do if an anchor bolt spins and will not tighten?
Stop immediately and do not keep turning it. A spinning anchor usually means an oversized hole, a hole that was not cleaned, or concrete that is too weak at that point. Follow your manual's relocation or repair procedure. Do not put a vehicle on a lift with a suspect anchor.
What power does a Daytona 2 post lift need?
Daytona 2 post lifts run on 240V single phase 60Hz power and draw roughly 12 to 13 amps depending on the model. The exact voltage and current are listed on the spec plate and in the manual. Have a licensed electrician size and run a dedicated circuit within reach of the power column.
Can a 2 post lift be installed outdoors?
No. All Daytona equipment is built for indoor use only. Outdoor installation exposes the columns, cables and electrical components to moisture and corrosion, creates a safety risk, and voids the warranty. If you have no indoor bay, resolve that before you order.

Planning a 2 Post Lift Install?
Send us your ceiling height, slab details and the vehicles you service most. We will spec the right Daytona 2 post lift and connect you with a distributor or installer in your area.
- 5-2-1 Limited Warranty (5 years structural, 2 years power, 1 year parts)
- ALI Certified option available on the BR10-2OH-33
- Canadian-owned manufacturer since 1999
- Freight included on warranty parts in the US and Canada
- Active distributor and installer network across North America